
Showing posts with label A Tippy's Top Tip. Show all posts
Showing posts with label A Tippy's Top Tip. Show all posts
22 February 2021
Homemade Plant Labels.
I recently made these plant labels out of the left over strips from venetian blinds. I first painted them with undercoat paint, allowed to dry and then painted the tips with gloss paint as I feel that will give them more protection from rotting. I have tried this before but without glossing the tips and whilst they were good while they lasted they only really lasted a season. I will probably save these to use in pot plants rather than out in the garden. They were set out in the seed tray like this while the paint dried. I used hand pruners to cut them to size and shape.


23 July 2020
Crown Bud Cuttings of Delphiniums.
I have this nice white Delphinium that I want more of and while I believe they can be increased by cuttings in spring I have decided to try something that I have never tried before which is to propagate by way of crown bud cuttings.
Below is the plant that I am taking them from and I hope it works okay because to get the cuttings I had to destroy the plant.

Once the plant you have selected for the cuttings as finished flowering cut down the flower stalks and leave the plant alone for a couple of weeks before lifting and washing clean with water. When all the dirt is cleaned of the root you will be able to see all the white buds that are to be the new shoots and these buds are what will hopefully become your new plants. I was a bit later doing these so some of the buds have already sent up leaves.

Each bud has the potential to make a plant. You really have to get in to the plant so that you can cut away the bud with a small piece of the old plant attached to it. You don't have to worry about getting it with a bit of root but if you do managed to get root already attached then that's fine. Below you can see how many potential plants I was able to get just from that one plant.

When you have all the buds removed just pot them up in to small pots and water in. Put them outdoors away from the sun and don't let them dry out. I'm not sure how long it will take for them to root but we will keep an eye on them and let you know.

Below is the plant that I am taking them from and I hope it works okay because to get the cuttings I had to destroy the plant.

Once the plant you have selected for the cuttings as finished flowering cut down the flower stalks and leave the plant alone for a couple of weeks before lifting and washing clean with water. When all the dirt is cleaned of the root you will be able to see all the white buds that are to be the new shoots and these buds are what will hopefully become your new plants. I was a bit later doing these so some of the buds have already sent up leaves.

Each bud has the potential to make a plant. You really have to get in to the plant so that you can cut away the bud with a small piece of the old plant attached to it. You don't have to worry about getting it with a bit of root but if you do managed to get root already attached then that's fine. Below you can see how many potential plants I was able to get just from that one plant.

When you have all the buds removed just pot them up in to small pots and water in. Put them outdoors away from the sun and don't let them dry out. I'm not sure how long it will take for them to root but we will keep an eye on them and let you know.

3 May 2020
A Tip For Cuttings.
The other day I had need to pot up some Geranium cuttings and it reminded me to share with you a little tip that seems to work well for me. Geraniums are not a difficult plant to increase by cuttings but they can rot off quite easily if you aren't careful so I've devised this method to prevent this to some extent. As you can see from the picture below there is sand in the pot and things can actually be rooted in to sand alone although I have never tried that myself. Instead I do a mix of compost in the bottom and sand on the top.
 I part fill the pot with compost and then add a thin layer of sand, this just gives me something stop the cutting falling over while i arrange them in the pot. When adding the cuttings try not to push them through the sand into the compost. As you can see in the picture below I pushed this one in a bit further than I should but there is still sand around the stem so it wasn't too bad. When you have the cuttings arranged around the outside of the pot then back fill around the cuttings with more sand to just below the level of the pot and then water in, this settles everything down around the cutting and also adds water to the compost below. I add the compost in the bottom as this stays moist but isn't actually causing the stem to sit in a lot of moisture. I also hope that it encourages the cutting to send out roots to reach for the moisture just below it.
 The picture below is a good example of how it works. The idea being that the moisture is where it's needed in the base of the pot and the stem remains as dry as possible to prevent rot. Also if there is a need to water again before rooted water from the bottom by standing the pot in a saucer of water. By the way, when I talk of sand it's actually horticultural grit that I'm talking about.


7 March 2017
The Easy Way To Fill A Bag.
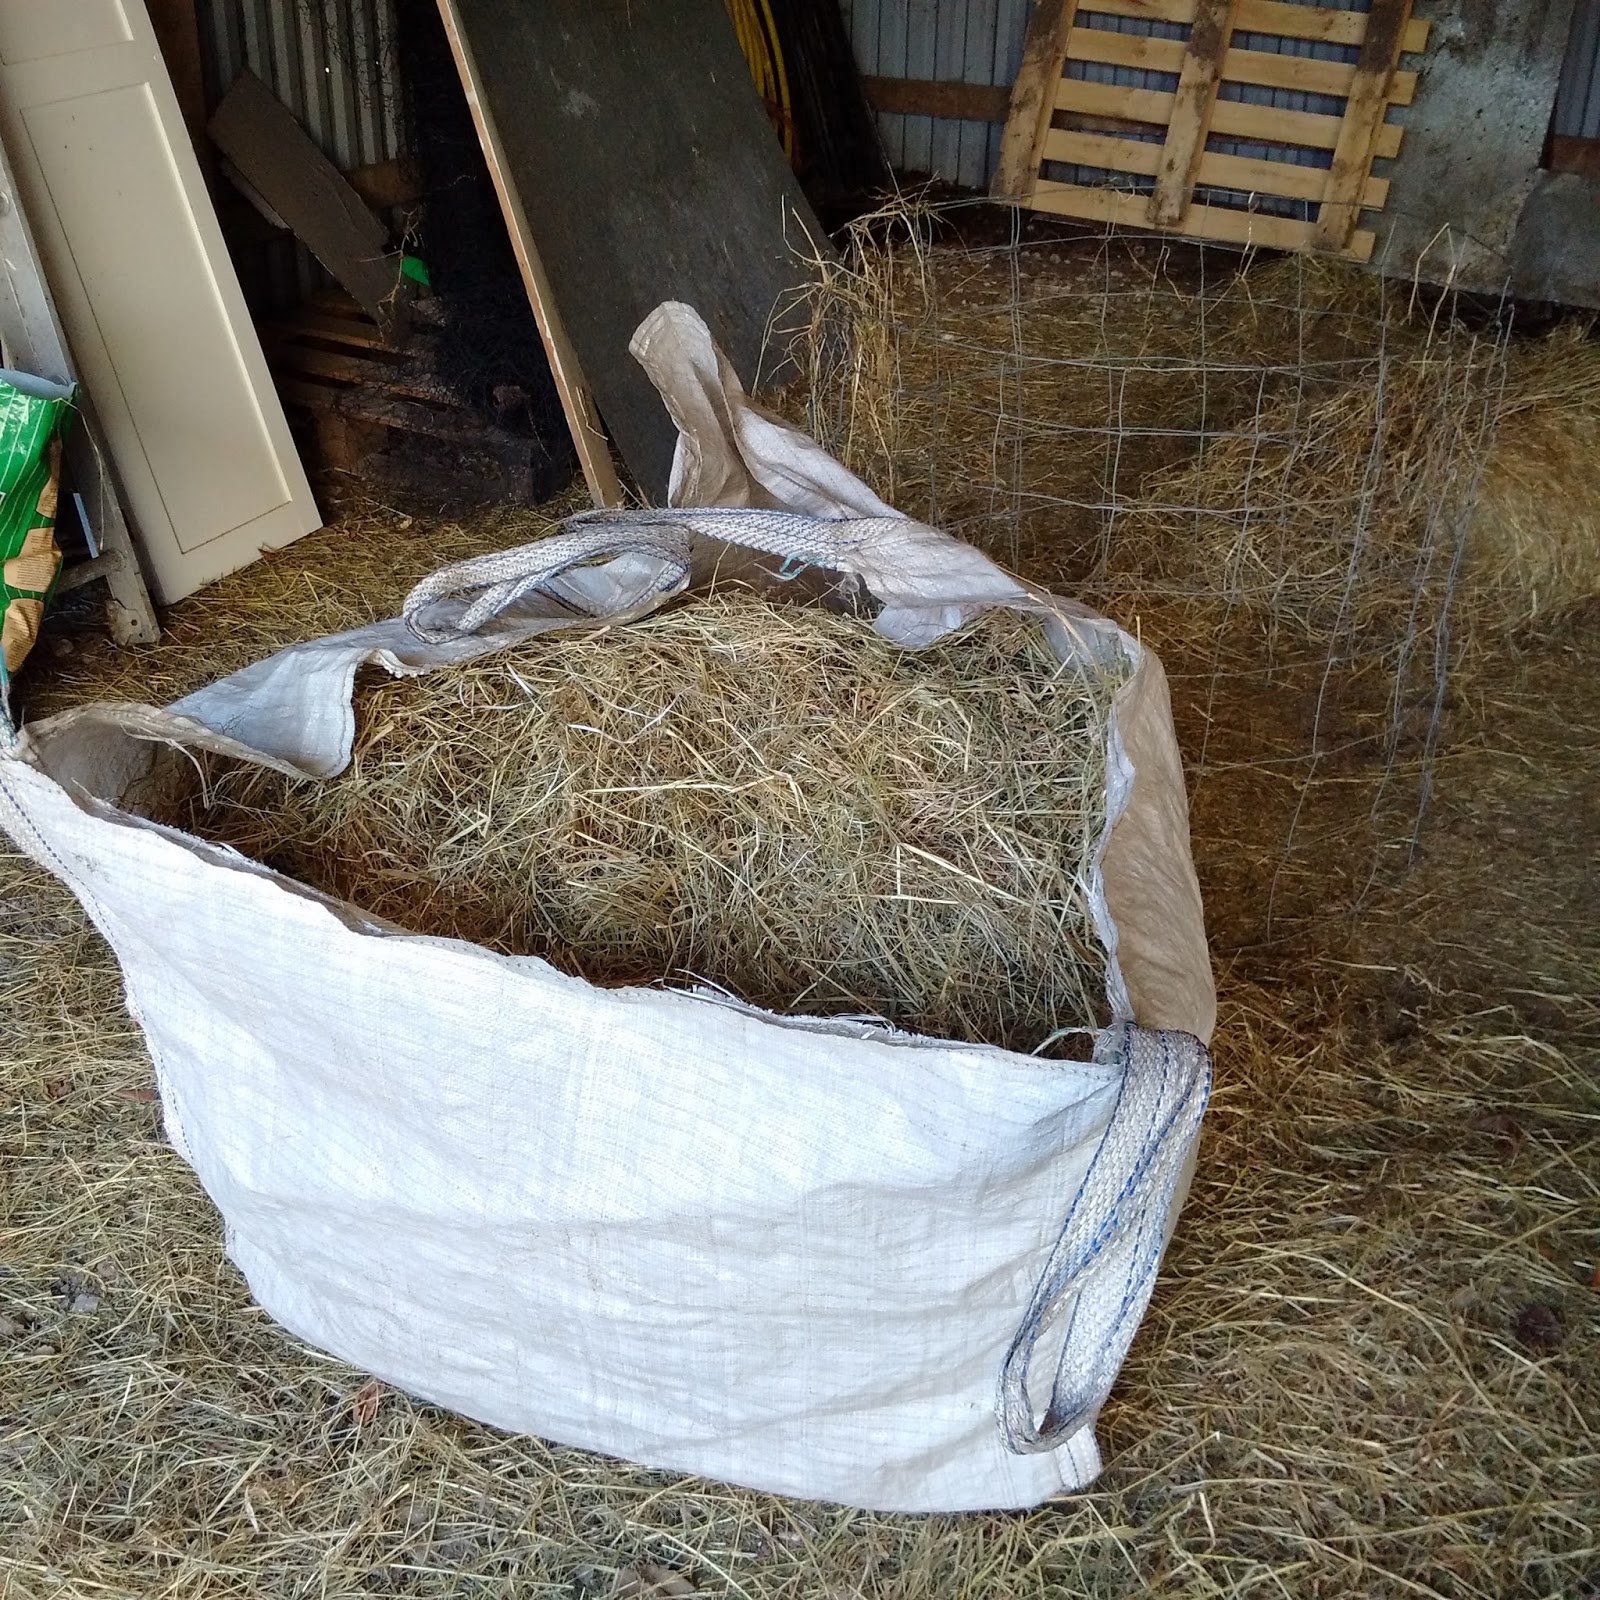
In a previous post I said that I would try to show you what other use I have for the ring of wire netting that I used as an example. So here it is again, this time being used for it's proper purpose rather than just a model.


The purpose of the netting here is to hold open a bag while I fill it. If you've tried to fill bags with garden rubbish the last thing they want to do is to assist you by staying open which I find to be a nuisance because usually I need both hands to hold the tools I'm using so what I do is stand the ring close to where I'm working as in the picture.

Next thing it to take your bag and put it over the ring, you will obviously need the ring to be slightly smaller than the bag you are using. You could put the ring in to the bag but I prefer to put the bag over the ring if you see what I mean.

When this is done turn the whole lot the right way up so that it ends up looking like this.

Now fill with whatever you are wanting to transport in the bag making sure to keep on testing the weight because when it's easy to fill it's also easy to put too much in without realising it.

Once you have the required amount lift the ring out of the bag and Bob's your uncle, off you go to wherever you are going. In my case I'm off to feed the sheep.
This post is one of Tipp's Top Tips in memory of Tippy the Border Collie.
28 July 2012
Tippy's Top Tip (Rounding up the walls).
As today is the second anniversary of Tippy's passing.

I am going to remember her with another of 'Tippy's Top Tips' which used to be a feature of my blogs. This tip I think is both interesting and useful.
Below are two pictures taken of two separate Tayberry plants, the pictures were taken within a couple of minutes of each other (the time it took to walk from one to the other). The difference between the two plants being that one is grown against a north facing wall and the other against an east facing wall. The north facing wall gets very little direct sunlight. In the summer it may get a little at each end of the day, in the winter none at all. The east facing wall gets full sun all morning but none in the afternoon. By looking closely at the pictures it's easy to see what difference this makes to the plants, the one on the east facing wall is in advance of the other by at least three weeks.
North Facing Wall
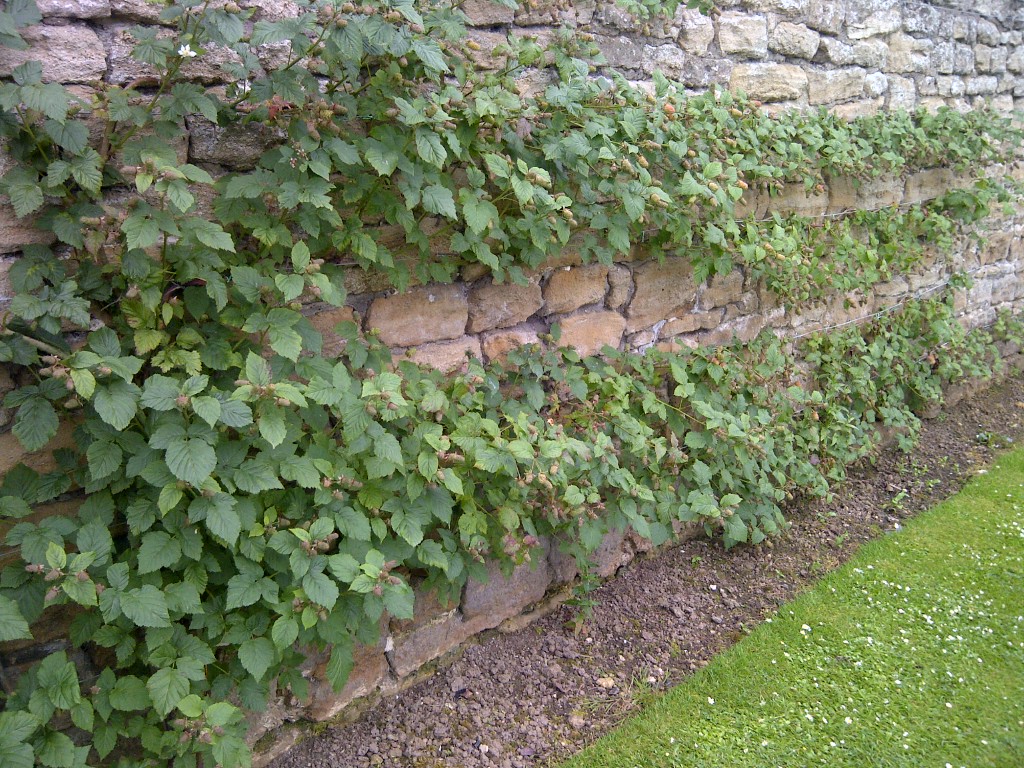
East Facing Wall

The growth difference of the two walls can be put to use in both providing the right growing environment for different plants, for instance you would have a hard time getting peaches from a north facing wall but a south facing wall would suit them well. In this instance I am using the two different walls to increase the length of the cropping season which it more or less doubles. This will work with many plants, but not all because some like sun and even more sun whereas others are not do fussy.
22 November 2011
Bubble wrap tip.
I Took these pictures a couple of weeks ago but didn't get chance to post them at the time. During the summer months most of the indoor plants that we grow are kept in the conservatory but because of the lack of heating in there they have to be housed in one half of the greenhouse for the winter as this has heating. Before moving all the plants in to the greenhouse I clean it all out and wash down the glass and the walls before installing bubble wrap insulation. With the greenhouses being quite a size it means I have to join pieces together, three widths in fact, each width being 1.5 metres if I remember right. The common method of joining bubble wrap is by means of sticky tape which I have used in the past and it works okay but I discovered what I think to be a better method, or at least it works better for me anyway and that it to use staples.

In the picture below I have shown a close up example of a join. If you fold over the two pieces and then run the stapler along the join putting in a staple ever two or three inches you will find it does a good longer lasting and more secure job than tape and of course staples aren't affected by water and sun etc.

Having a wooden frame to the greenhouse also means I can use staples to fasten the lose ends to the woodwork so all in all I have ended up with a good fitting inner unit. There are wires running along the roof which are there for training plants up so in the winter I use these to support the bubble wrap so there is no sagging or danger of it dropping in.


Thank you for your thoughts on the flyball. The thing is that when I applied to join the team I expected to go there and learn with Tess how to do flyball and then try to perfect it with her. In reality though all I do is go there, help put out the equipment, hand Tess over to someone else to run her and then hang around waiting to help put all the equipment back again before coming home again, so I guess that because it isn't like the idea I had in my head when I started I always come away feeling a bit let down. So I'm thinking that in the new year I will just take her walking instead, I think we will probably both get more out of that in the long run.
4 January 2011
Let There Be Light.
I’ve been meaning to show you this for a while now but never got round to it so I am going to show you tonight come what may.
To make this you need a small torch (flashlight), two rubber bands and your dogs collar.

You then assemble them so that they look like so…

And there you have a neck torch for your dog.

I know that you can buy lights to fit your dogs collar or even collars that light up and I was going to buy one for Tommy but after playing around with this I decided that it works better than the bought ones so I’m not going to bother. Apart from showing me where he is and because the light shines where he is looking which might be of little use to Tommy but with him being a nosey dog and always looking to see what I’m doing it comes in real handy because he shines the light and I have both hands free do the work.
Let There Be Light.
I’ve been meaning to show you this for a while now but never got round to it so I am going to show you tonight come what may.
To make this you need a small torch (flashlight), two rubber bands and your dogs collar.
You then assemble them so that they look like so…
And there you have a neck torch for your dog.
I know that you can buy lights to fit your dogs collar or even collars that light up and I was going to buy one for Tommy but after playing around with this I decided that it works better than the bought ones so I’m not going to bother. Apart from showing me where he is and because the light shines where he is looking which might be of little use to Tommy but with him being a nosey dog and always looking to see what I’m doing it comes in real handy because he shines the light and I have both hands free do the work.
18 July 2009
A Fruity Tip.
This is a little tip that I’m going to show you that makes life easier for me when picking fruit, Raspberries in particular. It doesn’t work so well with fruit that you pick while bending over, taller Black Currant bushes are another thing I’ve used it on with great success.
What I have in my hand is an ex-army ammo pouch.

This one clips on to my belt (which is covered by the shirt) that I wear all the time to hold up my trousers.

You could find something along the same lines to do the same job at a hiking store or similar. I like this one because I don’t need a separate belt also its pretty stiff canvas which as you can see doesn’t crush anything you put in there.
Then when you have it full all you need to do is take it off and tip the contents in to something larger and then set too and refill the pouch – hopefully many times over because I think most of us like our fresh soft fruits.
I’ve used this method for many years and find it handy not having to use one hand to hold a tray or whatever, it leaves both hands free for picking the fruit.
24 May 2009
Hanging Basket Project (Post One).
This contraption is something Vicki got me the other year and I find it quite handy for starting off your hanging baskets. In the one you see here I have three trailing Petunia's, I know it looks a bit sparse at the moment but these three plants will grow to fill the basket. Anyway what I like about these containers is that they're good for sitting on the greenhouse staging while bringing the plants on but once its time for them to go out in hanging baskets you simply put a bit of compost in the bottom of the basket and then drop this container with plants straight in to the basket and then the roots just grow on out though the bottom. In the picture there are three with Petunia's which are for a project I have planned for this summer and one with four trailing Tomato plants.

If you want to join in the Petunia project with me you need to get planted up three 12 inch (30 cm) hanging baskets with 3 trailing petunia's in each. Just plant them around the top of the basket and don't worry about fancy liners or trying to hide it as the plants will do that for you in no time at all, I line mine with an old compost bag cut to shape and with the black side facing out. If you have a greenhouse put them inside to bring them on faster if not then a warm sunny place outside will do and then in a couple of weeks or so I will show you what to do with them. Make sure you have one good strong hanging basket bracket in place by this time though. Also it will need to be a bit out of the way because the baskets will hang a bit low by the time we've done.
3 June 2008
Planter Tip.
Tonight Tippy is going to show you a little something we put together the other day. Me and Tom went to the garden centre as Tom wanted some bonemeal so while we were there I decided to buy some pots to do something I've been thinking about for a while now. I was just going to get three ordinary clay pots, it doesn't really matter what the pots are like as long as each one is smaller than the other, the reason for this will become evident in the next picture. As it turned out there were three pots that both fit the bill and that took my fancy.

If you start off with the biggest pot and fill it with potting compost and then take the next size pot and just put it on top of the one you just filled and lightly press down, this will both firm the compost in the lower pot and also mark where the pot will eventually sit. There should be a part all the way around the lower pot that the second pot didn't touch and this is now where you need to put some plants, I used Busy Lizzies but you could use begonia's or sat Petunia's, trailing Lobelia would be good too. When this is done then you do the same thing again with the second pot first of all filling it with compost as with the first. If you planted the first pot right you should be able to just sit in down on top of the first pot without damaging the plants. See the picture below.
 For the third pot you can finish off with the same sort of plants if you choose, I decided to put a Fuchsia in the top pot as I felt it would just give it that bit more height. Below is the finished article although I'm thinking I might see if Vicki can get some some trailing Lobelia from the shop as I think it would be better with something flowing down a bit although in time the Busy Lizzies will grow up and fill out.
 This next picture was taken later on in the summer and shows you how it all worked out.
All the best,
Bob.
29 April 2008
Tomato Plant Cuttings.
All readings are taken from a sheltered location in our
garden and cover a 24 hour period starting at 6pm.
Low Temp: 4.5C
High Temp: 16.4C
Rainfall: 0.3mm
Strongest Gust of wind: 1.4 mph
Weather Today: Bright and sunny,
some heavy showers late afternoon.
Hello everyone, I sure hope you're feeling well. Tonight I have another of Tippy's Top Tips for you. No doubt some of you are like me and enjoy growing Tomatoes. Well I will tell you something that I sometimes do, its also good for those who buy plants rather than grow from seed because this way you don't need to by as many. Once your plants get going you will find that there are lots of side shoots which in some cases you have to remove and even if you grow the sort of plants that don't need side shoots removing the plant won't mind if you take a few. In this instance I use a sharp knife that way you don't bruise the end. Below shows you what a side shoot looks like and where to make the cut.

If the leaves are a bit big then trim back the end a little so you end up with something like in the picture below and make sure you have a nice clean straight cut on the bottom of the cutting.
 Then fill a pot with ordinary potting compost and stick the cutting down the side of the pot to the depth of about half an inch to an inch and then water in. Then stand it somewhere warm and light but shaded from direct sunlight.
 Then in ten days to a fortnight you will have roots forming like this...
 ...and extra plants to grow on or give to friends.
I was intending to grow these on for planting out in the garden later but my dad has not done so well with his own Tomatoes this year so I will let him have these four plants so he will get a head start, you never know he might be so happy that he'll treat me to a pint of Fosters - now thats got to be worth having a go hasn't it? I have some more side shoots so I will take somemore cuttings to grow outside. This is so easy that even someone with brown thumbs can do it, even if its just for fun.
15 April 2008
The Plank.
All readings are taken from a sheltered location in our
garden and cover a 24 hour period starting at 6pm.
Low Temp: 0.3C
High Temp: 12.0C
Rainfall: 0.6mm
Strongest Gust of wind: 3.4 mph
Weather Today: Bright until 3 then came on to rain, still cold.
Today I got my Hytec onion sets so I set too and got them in the ground straight away. I just happened to meantion it to Tippy when I got home for lunch and she said to make sure I tell you about 'The Plank'. Unlike the onion sets there is nothing hitec about it, its simply a plank of wood that I use instead of a garden line for marking out the rows. It works well, better than a line for the shorter rows we have here in the veg garden at the big house. Its quite thin and is 12 foot long by 6 inches wide.

What I've also done is cut marks along the edges to mark out the distances. On the side you see the plank is marked off in 6 inches, every other mark being full width of the plank so its easy to measure either feet or half feet when planting. See the picture below, my finger is pointing out the foot mark and then you can see the 6 inch mark at the top of the picture. Then if you turn the plank over one edge is marked at 4 inch intervals which is the distance I plant my oinions. There is a free edge with no marking because I find the three that I have cover everything.
 As I say it works better on the shorter rows, if you have long rows then I think the line is better.
Also today, as it came on to rain in the afternoon me and Tom went to the garden centre for some grass seed to re-seed the piece of lawn where the Evergreen Oak came from. I have it all levelled and raked now ready for the seed. I haven't been in a hurry to put it in because the weather is still so cold. I don' want to sow it and have it sitting there for ages because of the dogs and kids digging holes in it.
Anyway I'd better be getting off now, take care.
Bob.
14 April 2008
Rooting Cuttings In Water.
All readings are taken from a sheltered location in our
garden and cover a 24 hour period starting at 6pm.
Low Temp: 1.6C
High Temp: 14.7C
Rainfall: 0.3mm
Strongest Gust of wind: 2.0 mph
Weather Today: Mostly sunny after a frosty start.
Tonight I'm going to show you a couple of Begonia's that I saved from last summer. They were actually runts that got held back at planting time because they were too small so I kept them in the conservatory as pot plants all summer and then on through the winter. Then around February time when they started putting on new growth I started taking cuttings from them. I suspect a lot of you will already know how to take cuttings from them but for those who don't here is how I do it. Its very simple and hardly any trouble, all you need it a sharp knife and some sort of small container that holds water, I prefer a clear one that way you can see when the roots are forming without having to keep disturbing the cuttings. I think in my example I used the top from a tub of toothpaste but anything similar will do.
Below are the two parent Begonia's
 Take your sharp knife and cut off any new growth that is of a similar length to the pieces you see in the picture below, around 2 to 3 inches, don;t worry where you make the cut at the moment.
 Now strip off the lower leaves and any flowers leaving just a couple of leaves as in the picture then take your sharp knife and make a clean cut just below a join as I am about to do below.
 Thats all there is too it, put your cuttings in the container as below and fill to the top with fresh tap water and be sure to keep it topped up with water until you see the roots forming on the stalks. You can keep them on a warm window sill but be sure to shade from any direct sun light. I always find the kitchen is a good place as its usually warm in there and also its handy for the tap to keep the water level topped up.
 Then when you see little roots, if you look closely at the picture you will see what I mean. This is the time to take your cuttings and pot them up in to a general purpose potting compost. Handle the cuttings by their leaves though as the roots are very delicate at this stage.
 In about three weeks you will have lots of lovely new plants like the ones I have below, I think I have 40 babies so far from the two plants which I'm really pleased about, especially as they're almost for free and from two plants that nearly got thrown away.
 There are quite a few plants that you can root this way, I usually root Impatiens this way and I also find that Fuchsia's root easily in water. Anyway I hope that is of help to someone and if you need to know more just ask - okay.
Subscribe to:
Posts (Atom)